Monday, February 3, 2014

Moving Things Along

I've been sick with the flu (no, I did not get the flu shot). It was not the worst flu I've ever had, but still. It had me flat down for an entire week, during which time I had not cut one thread, nor sewn a single stitch. About the quiltiest thing I'd done all week was look at blogs and comment on a few of them.

I finally started feeling human again. I decided to make another star last night, which you see above. I used the mirrors, and came up with this one. You could go crazy with all the possibilities. Don't look too closely, its not perfect. A little wonky in the center. Oh well, adds to the charm I guess.


I also tried making a couple more of this style. I really like these. I think they're more - I don't know, homey or earthy looking than the fussy cut single-fabric ones. I'm not sure which direction I'm going to go with this. I'm not sure they'll all "go" together, if you know what I mean.


Meanwhile (before flu) I've been reevaluating this piece.  Something about the scale just wasn't right, the applique in the center ended up being pretty much dwarfed by all those extraneous strips, blocks and borders. So I removed all the junk, leaving this, which looks correct to me. It kinda reminds me of a Lori Smith piece, so I guess it can't be all bad. So, it will be yet another wall hanging. Or table topper. Whatever.

Here's what it had evolved into earlier:

Frankenstein

I had to ask myself, what is the purpose of this quilt? Do I want to make this into a large quilt? Would it even work for a bed? What about the wall? Would I hang this in my home? No, no, and no were the answers. So.. where was it going, and did I really want to spend my time completing it, when it was just sort of making me crazy? Another resounding NO. 

I think it was just one of those crazy ideas which manifested in a sewing frenzy, giving birth to a Frankenstein, and I'm glad I'm over it.

 
Ahhh.... I feel much better now!


love,
Sandy


Friday, January 24, 2014

Lemoyne Stars!

I got bit by the English Paper Piecing bug.

Never mind I'd never even hand pieced before, let alone even considered English Paper Piecing. Come to find out, its not really that hard. Time consuming and a bit persnickety, but really, you can't go wrong if you follow the steps. The next thing you know, you've made a beautiful star! And I have to warn you, they're addicting. 

What inspired me was when I saw what Sheryl of Temecula Quilt Company was doing on her Fussy Cut Fridays series. One look, and I knew I just had to make some of these stars.

First let me say, I've always loved the Lemoyne Star, but always thought it was beyond me to make one - let alone a bunch of them. Inset seams? forget it. When Sheryl showed her EPP method, I thought - you know? I just might give this a try. You could say, I talked myself into it. Now, you might have noticed she's actually making a six-pointed star, but I didn't figure that out until I'd already made three eight-pointed stars and finally realized there was something "different" about mine. Apparently I can't count.   

My first tries at fussy cutting were - ok - but could have been better. So how timely that Joann's just happened to be having a half-off notions sale last week, where among other things, I got a new (sorely needed) ironing board cover...

 gridded for blocking and has a ruler running the length of it - how groovy is that?

And.. Marti Mitchel's Magic Mirror..

...which helps tremendously in fussy cutting. Here's how it works:

As you can see, the possibilities are many with this piece of fabric, so let's try some out.
 
Can you see my diamond template on the fabric, with the mirrors lined up on the sides?

Here's another view.
and another
You can see here I took a couple of my paper pieces and lined them up along the outside of the diamond, so I might see more clearly what the star would look like.

Eventually I started getting distracted by the writing on the template itself, so I decided to cut a "fussy hole" out of an old checkbook box.


better.
See how fun this is?
The mirrors do have a limitation though, as you can see below, if the design within your diamond is not symmetrical.
Anyway, I "played" with about a dozen fabrics last night, but got too tired and didn't cut any of them! That's what I'm headed off to do now.

This is gonna be a sweet, fun little (or not so little, who knows?) on-going project, which may take years to complete. I have no idea how many stars I will make, or what quilt they might end up in. Who cares? This project is about the process for me, and so far I'm loving it.

Are any of you sewing along with Fussy Cut Fridays? If so, please comment and point me to your blog. I would love to see your stars. 

love,
Sandy


Monday, December 30, 2013

Vintage Modern Surprise

Yesterday I spent pretty much the entire day in my sewing room, cleaning, organizing, and culling. Regrettably, it doesn't look much different than when I started. You know how it is. You pick up a piece of fabric, stare at it for several minutes, then put it back on the shelf. Or in the box. Or in a different box. Once in awhile you relegate an unloved item to the "go away" box. Sometimes you take it back out again. At the end of the day, I did manage to cull enough stuff to make it a little easier to move around the room, and in the process take inventory of my so-called "collections".


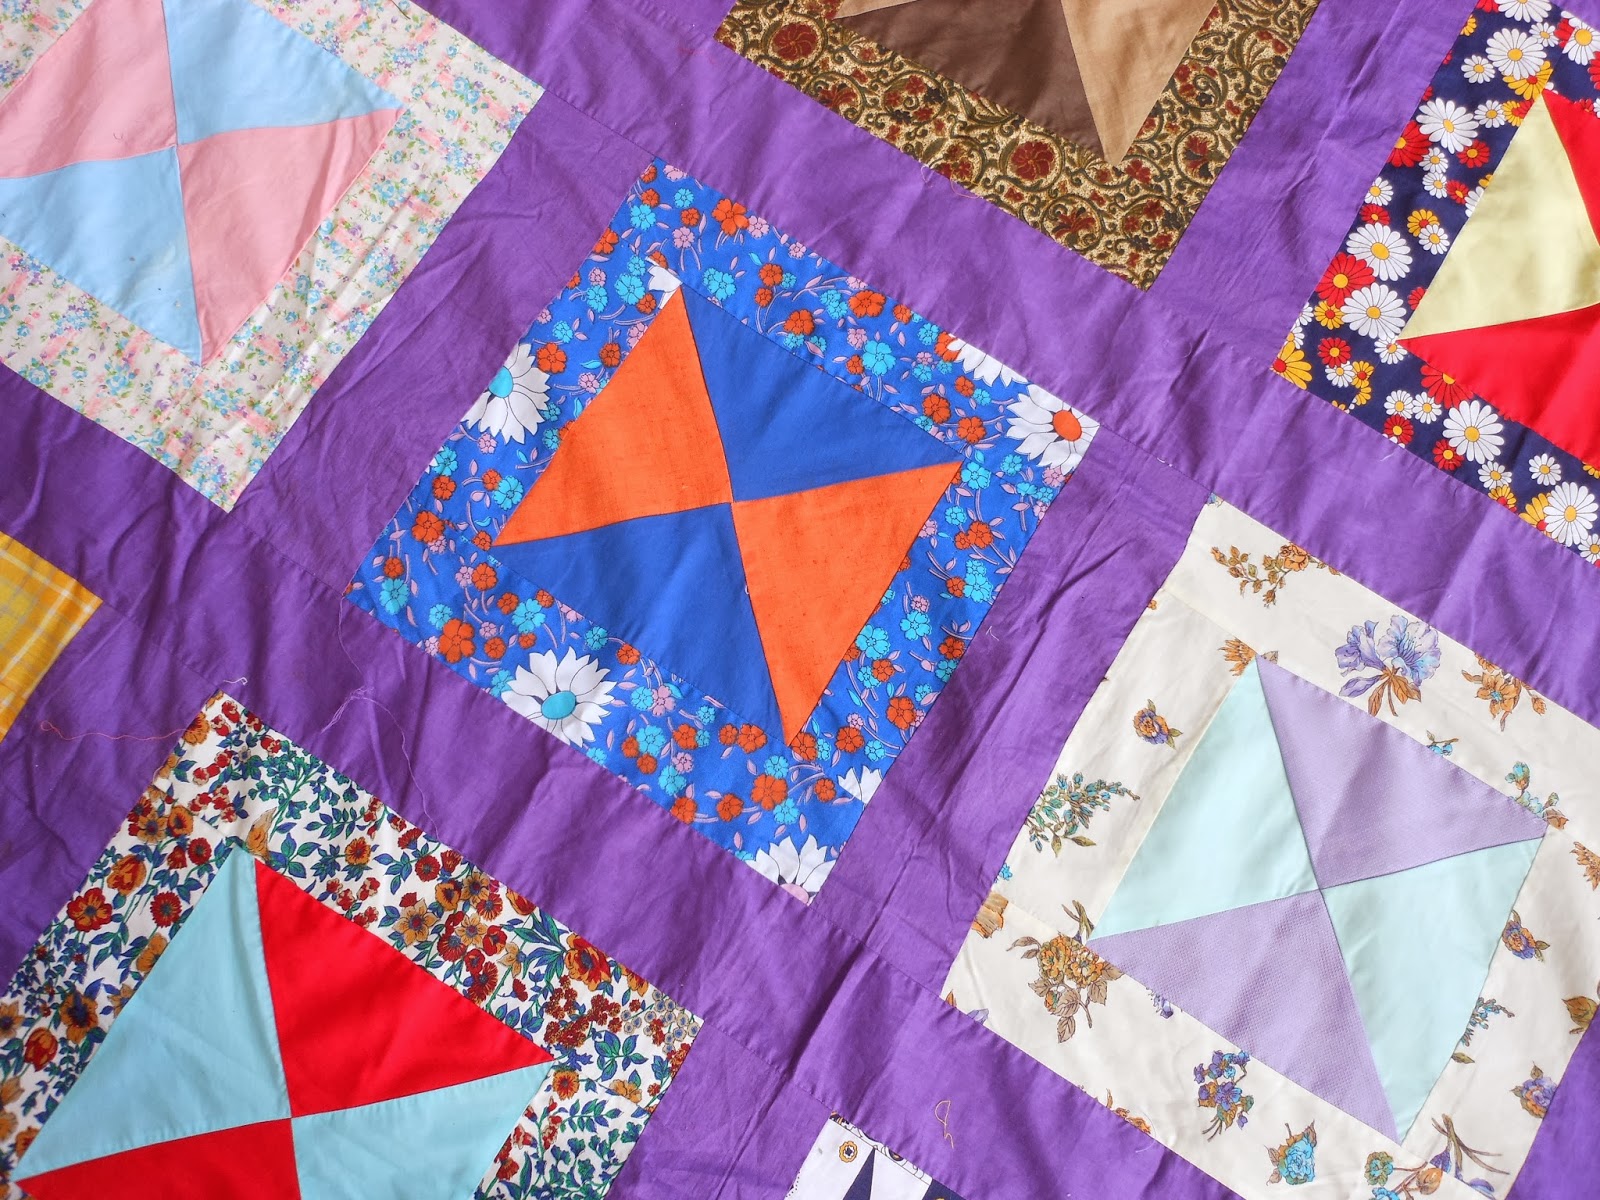
One box was (is still) full of mid-20th century-type stuff, among which I found this quilt top. I honestly don't remember when/where I got it, in fact finding it in the box was a total surprise to me. The blocks measure over 12", so its a fairly decent size.  I don't know about you, but it looks to me like it would fit right in with the Modern Quilt movement.


Am I the only one who gets excited over these funky '60's fabrics? I wonder if they will ever have their day, and become trendy.


Some of the prints are truly whacky. Others are truly horrid - or wonderful, depending on your point of view. Most would have qualified for our guild's Ugly Fabric Contest which we held at our December meeting.


Whoever made this top had a great sense of color, imo. The blocks are so vibrant, they practically pop out of their purple boundaries. There is one dud... I think you can find it.


I'm not sure what to do with this. Should it be quilted? if so, how?  I don't know if it even lays flat enough. And if I quilt it, then what am I gonna do with it? I really don't have room to store quilts I don't use. Heck, I don't have room to store the quilts I do use! Would I use this?

Maybe I'll hang onto it, wait for '60's prints to make a comeback. Properly finished, it might do well at our auction. Maybe someone other than myself will fall in love with it, too!

love,
Sandy


Wednesday, December 25, 2013

Baskets

Nothing Christmas-y to show today, but...  at least I finished my baskets! The top, that is. I really really love these fabrics, and am very happy with how the top turned out.


Now I have to figure out how I'm going to quilt it.  The baskets are a bit wonky and I think quilting in the ditch around the baskets would only accentuate the flaws. I'd like something overall, like maybe the Baptist Fan? And maybe a cable or grid in the border? What do you think?

Meanwhile, I hope everyone is enjoying a Happy Christmas with your loved ones, and that Santa was good to each and every one of you!

love,
Sandy

Saturday, December 21, 2013

Easy Glasses Case


Here's a super easy method for a cute glasses case I came up with, which you can complete in about 10 minutes.

Here's what you'll need:
one piece of outside fabric, 7" wide by x 9" long
one piece of lining fabric, 7" wide by 9" long
one piece of cotton batting, 7" wide by 9" long

First you want to choose two coordinating fabrics


Cut a 7x9 piece from each fabric, and from a scrap of cotton batting. Layer your outside fabric on top of the lining fabric, right sides together, with the batting underneath.


Put a few pins along the top 7" edge, and sew 1/4" seam. Notice I'm using my walking foot.


Now open the layers, and fold back so the right sides are facing out and press...
 ...then fold back so the batting is in the middle and press again.


Now fold the lining back over the outside, about 1 1/2" and press. I know, I seriously need a new ironing board cover! Please ignore the stains ~


Next, fold in half lengthwise, inside out, and pin.
Be sure and match the folded ends


Now sew together down the side and across the bottom, 1/2" seam.

Here's where you have an option. You can simply trim the seams, clip the corners and call it a day. But if you're worried about the unfinished seam (which is hardly noticeable btw) you may finish it very easily like this:
Fold the lining fabric back on one side before you trim, then whip stitch it over the seam.
I'm lazy so I only stitched it about two inches down, leaving the rest of the seam unfinished. Your glasses won't care, trust me.


Turn right side out, and push corners out with a chop stick or similar tool.


 Done!


Seriously, this took about ten minutes to make. Well... eleven if you count whip stitching 2" down the seam.


Embellishing is easy, and fun.  I'm sure you can think of lots more variations. But beware, these are addicting!

love,
Sandy


Friday, December 13, 2013

Lucky Me!

Look what came in the mail yesterday!


Lynn at Sew'n Wild Oaks hosted a giveaway a week or so ago, and  I was the lucky winner and recipient of her new Patchwork Math book!


I've been intrigued with this book ever since Lynn published it, but hadn't yet worked up the energy to make the 1 1/2 hr. drive to her store to take a look at it. I eventually talked myself out of "needing" it. Boy was I wrong! I NEED this book, and chances are, you do too.

You ever wonder how to figure out just how big to cut the squares for those pesky setting triangles? Wonder no more, Lynn has figured it out and gives the formula. Same with elongated star points - how to measure, cut and accurately connect those long triangles, which is key! She explains and illustrates everything from half-square triangles, quarter-square triangles, flying geese, and all kinds of variations of the above and more - she has figured out the math and the method for it all. And then shows you how to use the units to construct a variety of different blocks. And the greatest thing is having all these instructions all in one place, so I don't have to go digging around for whatever book or magazine I once thought I saw it in.

I highly recommend this book. Now, go here and order one!

Ah.. life just got easier! Thank you, Lynn!!

Meanwhile, I finished my little Americana Quilt, but not before making a total u-turn on the binding and backing. Here's what the plan was:


I was sure I wanted the blue plaid for the back and binding. I went ahead and installed the binding, therefore finishing the quilt, and .... I hated it. In fact, I decided at that point I really didn't like how the back looked, either. So... and this is the first time I've ever done this... I cut a new back, and quilted it right on top of the old one. I'm a bit nuts, I know.


But it looks nice, no?  And I went with red for the binding. Which my husband picked, btw. Maybe he should be the quilter!


Now, its finished. I promise!

love,
Sandy

Wednesday, December 11, 2013

Sad

I'm so bummed. I got an email this morning informing me The Old Country Store  has suddenly closed. This was my favorite online fabric store!

And... what happened to "Inspired By Antique Quilts" ???
I just clicked on her blog and there's nothing there! Just the home page, which states "no posts." ?!?

Dang.