Saturday, December 2, 2017

Hourglass Medallion Nearly Done

Some of you may remember the countless pictures I posted of this quilt when I was in the process of making it. I was sure you were all sick of looking at it. I was sick of looking at it.  So I promised I wouldn't show it again until it was done.


That was four years ago.

 No, its not "done" .. but I'm done with the quilting, anyways.

At the time I finished the top, my intent was to machine quilt it. However the going was really slow, and I had too much difficulty going smoothly around those tight curves. The thought of sitting at my machine for as long as it would take to do it was very depressing, especially considering the shaky results I was likely to end up with. So I thought, hell with it, I'll just hand quilt it. Much more relaxing, and a successful result would be guaranteed.


 (ps that's my teddy bear in the background, who's in the 
process of getting new hands, feet and ears.)


I dove into the quilting process with great enthusiasm, which went along great for awhile. But eventually it stalled, due to ongoing tendon issues, and, frankly, boredom with the tedium of marking and quilting all those little curvy things.


When my hands were up to it, there might be another newer project that was more exciting to work on.

Like a doll quilt.


Or this.


This was another one that was intended to be completely machine quilted, but I had problems getting the arcs smooth ... and those are big arcs!

Anyway... I did manage to plug along on the hourglass quilt a little here and there.


Quilting the medallion was fun, and a break from the tedium.

Finally one day, I discovered I was almost finished! I only had a dozen or so hourglass blocks to quilt, so I revved up the motor and got them done. But then ... oh yeah. The borders.

By this point, I really didn't have it in me to hand quilt the borders. But in the meantime, I got my new machine (that was three years ago) with the hand-quilt stitch, which is much easier to manipulate around curves, etc. and would blend right in with the hand quilted interior.


I liked the idea of a cable in the wider border...


and a simple diamond shape in the smaller, inner border.

I love the way the machine "hand quilting" blends in with my own hand quilting. You can hardly tell the difference (except the machine quilting is more even and consistent.) And... I got the borders done within a couple of days.

Yay!

Now all I have to do is bury some threads, and put on the binding. And label it, of course. When that's all done, I'll post a pic.

love,
Sandy


Monday, November 6, 2017

Marvelous Mini Revisited


or I should say, remade... and then some.


To refresh, the image below is how I set my Marvelous Mini blocks a few weeks ago. In my previous post I confessed a change of heart, resulting in my turning around and picking it apart a few days later.


I really wanted to love this quilt.  But the more I looked at it, the more I knew it wasn't ever going to happen. I found myself frowning instead of smiling whenever I looked at it, and more and more I had the inclination to just stuff it in a drawer.

Something had to change. This quilt should be all about the blocks, but they sort of get lost as rendered above. Instead of standing out, the blocks seem to sink behind the sashing, especially the red. Even the border fabric - pretty as it its - competes with the blocks.

My friend Pam and I worked on these quilts at the same time, and I rushed to complete mine (my excuse, btw) so we could do show-and-tell with our quilt group. When Pam held her quilt up, it took my breath away. She set her blocks in a simple, dark blue print, all the same. Very simple, very gorgeous. I knew immediately that's what I wanted to do with mine.

After picking it apart, I took all the pieces to my quilt retreat over the weekend, bent on reworking it with my new chosen fabrics.


Much better, don't you think?

The narrow dark blue sashing does a way better job of defining the blocks, even considering the fact that the outer "logs" are of varying value, many of them dark. Some of them disappear into the sashing, but I think that's ok.  It adds interest, and keeps the eye moving. The printed border makes it appear as if the blocks are floating in space. With this rendition, the viewer's attention is definitely drawn to the blocks themselves. Which is as it should be, imho. 

Now on to the rejected floral border and stripe. I still think is a brilliant combo and and an ideal setting solution for something, and I believe I had the perfect idea what to do with it. 

 
I pulled colors from the border fabric - basically, browns, reds and greens, for sampler blocks. About half of these came from Lori Smith's book Fat Quarter Quilting, the rest from other sources, including a few from my brain. See, now these blocks let the borders etc. know who's boss!

Speaking of brain, mine didn't register the fact that the replacement sampler blocks were actually a half inch larger than the Mini blocks (I thought they were both 4" duh... ) and because I didn't have any more of the stripe sashing fabric, I had to go with fewer blocks. But I think it works better with the twelve blocks anyway, don't you?

With that done, I decided to attack my carton of  1" strips left over from the mini's. I thought maybe a little Log Cabin doll quilt would be a neat idea.

Not sure l'm done with this yet. Maybe I'll applique a big black crow on it somewhere, and call it "primitive" (insert winkie face) !

Anyway, I had a great quilt retreat, and all in all I think I did pretty good! 

love,
Sandy

Monday, October 23, 2017

a slight adjustment (ahem...)

Recognize this?


Its my Marvelous Mini framework, missing the blocks.


 What happened, you may ask. Well, here's what it comes down to.

This was definitely a "process" quilt, and I thoroughly enjoyed every minute of making these darling little blocks. I also enjoyed picking "just the right fabrics" (or so I thought) for the setting. Unfortunately, the more I looked at it once it was all sewn together, the less happy I was with the resulting top. Don't get me wrong, I love the blocks, and I love the setting. I just don't think they belong together. I think those tiny little 2" blocks just got lost.

So while slogging through episode 3 of Ken Burns' Vietnam War the other night, I went about slowly picking the the whole thing apart.

Yeah, I know. I'm insane. But there it is.

Anxious to move ahead, or backwards as it may seem, I went back to my audition pix and really like how the blocks pop out on a more solid color. Then I fished around and came up with this idea.

This is just pieces of fabric slapped together, but you get the picture.

I have a quilt retreat coming up in a couple weeks, so will have time to do some fine tuning, and do the cutting and sewing.  Also give it time to marinate, in case I change my mind again.


 Meanwhile, I have some ideas of what I want to fill those holes with. One thing, they will be four inch blocks, not two inch with scrappy borders. (not that there's anything wrong with that, ha ha) Probably sampler-style, probably reds and browns.

So that's what's on my design wall today.

Check out what others have on their walls on Judy's blog, Design Wall Monday.

Monday, October 2, 2017

Marvelous Mini Flimsy

I sewed along with Temecula Quilt Company's Marvelous Mini Mondays, and I just now got my top sewn together.


I made all the pieced blocks, but fewer postage stamp blocks and none of the "plain" blocks. Good thing, as it is, I barely had enough of my chosen fabric for the vertical sashing, which I had to piece, and also squeaked by on the borders.

Will go ahead now and link up with Judy's Design Wall Monday.

love,
Sandy


Wednesday, September 6, 2017

Spray Basting on the Garage Door

I'm sure there are lots of opinions on whether or not one should even use the stuff (basting spray).  However I believe when you plan on doing an all-over curvy quilting design where pins would get in the way, spray basting presents a handy option. I do feel it must be done outdoors. But have you ever tried to tape a quilt back to concrete? Not easy, nor is manipulating the layers once you've sprayed.

So.. one sleepless night, I spent a few hours surfing the internet and Youtube, trying to find a better way. I eventually came across this technique , which  I think its brilliant!


I first tried it over the weekend on my Rail Fence quilt, as you can see above. Its amazingly fast and easy. One tip I'll add is that I placed a little rubber bumper in the middle of the garage door, as a placement guide for my layers. Then all you have to do is find the exact center of each layer (back, batting, top) and make sure the centers are over that dot as you layer. No guessing, and is crucial especially when your backing piece ends up being barely big enough, as is often the case with me.


On to the quilting. I used one of my favorite patterns, the large arcs, which are like an oversized, random Baptist Fan. Easy, with a walking foot. And dense enough to give a wonderful crinkle after washing and drying in the dryer.


I was able to use a little wider arc on the plaid quilt, about 1 1/8", and only two "fans", which made this one even faster. I love how they turned out.

Now, what about this crazy weather! It was oppressively hot over the weekend here, with temps above 100 three days in a row, topping out at 111 on Saturday. This was in Watsonville, which is on the Monterey Bay, on the Central Coast of California, where people who live inland come to cool off! It was actually hotter here than most of those inland cities. Very strange, and a bit scary. 

None of the houses here have actual air conditioning, because it "never gets that hot" here. We do top100 from time to time, but "it always cools down at night" - another constant that never happened last weekend. It never got below 65, so the house never cooled down. My "air conditioning" consisted of a small fan in front of the window in my sewing room, which I had pointed directly on my face as I was working, about two feet away. My tiny little oasis in a sea of sweltering heat.

I'm happy to say its cooled down to a muggy mid-70's this week. But you know I can't complain too much, at least we're not in the line of any major fires, or hurricanes. Keeping fingers crossed on that ....

My heart and thoughts are with the thousands of folks being burned out, blown out, or flooded out by these devastating events. Not to mention the wildlife, and loss of habitat. I pray for relief, all the way around.

love,
Sandy


Monday, August 28, 2017

Temecula Mini's

Today Sheryl posted her layout for her Marvelous Mini's, which I've been sewing along with the past few months. I'm pretty much caught up with the blocks, so I started auditioning fabrics for the setting strips. Here's what I've looked at so far. Maybe you can help me make up my mind!

This is the first fabric I auditioned, and I loved it right away! Trouble is, I don't think I have enough. Maybe if I used it for the vertical stripes, and something else for the horizontal strips.


At first I thought this was boring, but its starting to grow on me. And I definitely have enough for the sashing, and a border. I'd want to add a second, more interesting border tho, and maybe some cornerstones.

This works - the blocks definitely pop - but maybe too much?  I think its probably too light.


Whew! Busy. Looks like a carnival. Kinda cool, though ...


Paisley for the vertical and dots for across? Hmmm....


And then there's my old standby, denim. I'd have to jazz it up a bit, with cornerstones and an interesting border.

Well there you have it. This is what's going on, on my design wall today. What do you think??

love,
Sandy

oops... almost forgot to link up with Judy's Design Wall Monday!

Sunday, August 27, 2017

Another Vet Quilt

I'm sort of on a roll with these right now. For one thing, I'm on a mission to reduce the bulk of my stash, with the hope that I can free up some space in my sewing room. Chipping away at my stacks of fabric has actually helped .. somewhat. Of course all those strips I've been cutting have to go somewhere in the meantime, which means filling yet another bin which I have to find a spot for. Its like a Chinese puzzle. Or, robbing Peter to pay Paul. And then what do I go and do? I just ordered four new cuts of backing fabric, because they will be "perfect for Vet quilts" ! And so it goes.

Anyway, after finishing one of the Rail Fence tops yesterday, I started rummaging around for a bin I might be able to empty (for the strips) and ended up going through one labeled "UFO's, random blocks, and leftovers". One bag was leftovers from a couple of plaid quilts - well several, actually, as leftovers from the first one went into the second one which went into the third... and on down the line like that. Three or four plaid quilts later, I still had a bag of leftover blocks and scraps. This morning I started playing around with them, and came up with this:


Here's how it all got started.
I don't have a picture of the original plaid quilt, but it was a Bento Box which I made for my nephew just about ten years ago. Far be it from me to figure out my yardage and cutting ahead of time, and apparently can't count while I sew either, so I ended up with four 12" Bento Boxes left over, a few partial BB's, and about a hundred more 3" strips than I needed. Into the leftover box they went, where they languished for a few years.

Then another project (later? earlier? I can't recall) where I reduced the pattern and made a small wall hanging for myself, and somehow ended up with four 6" Bento Boxes leftover.


Fast forward to a couple years ago, I needed to make a quilt for another nephew. I turned most of the leftover 3" strips into four-patches, sewed them into a top, then cut an additional bunch of 5 1/2" squares for a couple of borders.

Davey's Quilt
I got a great quilt out of it, but now I ended up with a leftover stack of 5 1/2" squares, several four-patches, and a handful of random strips, which went back into the bin.

Which were almost entirely consumed by today's plaid quilt.


This is about as close to improv as I will ever get. I did fall back on my friend Claire's "Scrap Strategies" which are very inspiring, and helpful to a linear, stay-within-the-lines quilt maker such as myself. No doubt Claire would have come up with a much more artistic arrangement, but I think this one will do OK. 

This new quilt will most likely go to my guild's Quilters for Hospice group, and through the "We Honor Vet's" hospice program, will be given to a veteran currently in hospice care. Hopefully the quilts we give them will live on with their families, and bring them comfort and memories of their loved one.

At any rate, I consider today's scrap-busting exercise a success, resulting in a fun, interesting quilt, made entirely of leftover blocks and scraps. btw even the black inner border came out of my leftover binding box!
Here's all that remains of the plaid scraps...


...which I can now turn into triangle squares, log-cabin strips, and four-patches.

Yay!

love,
Sandy

Monday, August 21, 2017

More Stash Busting

I've been working on cutting my (mostly "less loved") fabric into 1 1/2" and 2 1/2" strips, with the idea in mind to make scrappy lap quilts for the wounded vets. We're getting ready to take a big load of quilts and books to the VA hospital in Palo Alto this week, and I'm proud to have made several of them this time around.

On to the sewing! The obvious choice with the 1 1/2" strips would be a Log Cabin, so I went ahead and made one of those a few weeks ago. (pic etc. to follow)

This week I decided I'd like to try a Rail Fence quilt. This idea was inspired by one of Kathie Holland's quilts, a rather large Rail Fence, using 5" blocks, which was featured in the August 2011 APQ Magazine, and in fact graces the cover of that issue.

taken in natural light, true to color

The way they're constructed and arranged gives a "basket weave" look - very cool!

Kathie suggests a very slick and efficient way of constructing many blocks at the same time, by sewing five long strips together then cutting them into blocks. Unfortunately, my strips were all kinds of varying lengths so that method didn't work so well for me. I ended up cutting my oddball strips into 5 1/2" lengths, then going from there. Still, I made dozens of these blocks in a very short period of time!

By last night, I had more than doubled the above.

taken last night in artifical light, which warms it up quite a bit

I toyed with the idea of putting the blocks all together for a single large throw, but then.... where was that quilt going to live? No room for it here, and too big for a Vet Quilt (they're very specific at the VA). So I'll most likely make a few more blocks and turn them into two Vet Quilts. Much easier to handle (and find backs for) and so satisfying to give them to our injured soldiers. Meanwhile, I'm liking the idea of a scrappy 2" border to reign it all in.

Back to those "unloved" fabrics. Funny, they look so much prettier once I cut them into small strips! Another thing I noticed is, the quilt gains more than a bit of life from the whites and (relatively) brights, especially the pinks and yellows, usually shunned in my normal fabric selection. Hmm.. am I learning something here?

the Log Cabin

The Log Cabin looks quite lively, don't you think? Hopefully will cheer and delight whoever receives it. Its densely quilted, with a flannel back, so nice and crinkly/snuggly.

Another thing I learned from making this particular quilt is that (my MANY) mistakes (cringe! ha ha) don't show up in the overall look of the quilt. Thank god, LOL!!

Another thing I noticed while cutting strips are the many fabrics in my stash of very small scale - which I normally find uninteresting - but are ideal for making teeny-tiny blocks, such as the TQC Marvelous Mini's I'm also working on. If I had it to start over again, I might zero in on some of those, instead of trying to make sense of my "precious gems" that often lose their character when cut so small.

Anyway... enough for now. Time to link up with Judy's "Design Wall Monday" before it turns into Tuesday!

love,
Sandy

ps Does anyone have any tips on how to post from an ipad? I can't find a way to access my pictures for the post. For now I have to email the picture to myself, then go from there. Very inconvenient.


Monday, July 3, 2017

Marvelous Minis

Sheryl over at Temecula Quilt Co. is hosting this irresistible sew-along, calling this one Marvelous Mini Mondays.


Any of you out there who are making these know how fun they are to make!


This is the basked of scraps I'm working from.

Today marks week 5, but I'm not quite caught up. Swing back later tonight or tomorrow, I should have posted a couple more blocks by then.


Meanwhile, a while back I had the brilliant idea to make a braid quilt. I got the idea from Lori over at Humble Quilts, who made a really cool one a few years ago. I'd throw in a link if I could find the post ....  anyway ~ about mid-way through mine, I decided it just looked like a royal mess. Later (much later) I deconstructed it into strips, then set about turning most of them into Triangle Squares, and sewed them into a Vet Quilt.


Much better!

Now to link up with Design Wall Monday

love,
Sandy

Monday, June 5, 2017

Stash Busting

I think I've gotten a little overwhelmed with my "collection" of beautiful (and not so beautiful) fabrics!

As fabric hoarders collectors go, I'm probably not the worst case, but the limited room in my fabric cupboard and bins has been more than maxed out, which leaves very little (read no) room for new acquisitions. Which I think are essential to keep one's stash fresh and interesting.

So in an effort to pare down, I decided to start by attacking my browns, which I have several stacks of, and my greens, which I don't use nearly enough.


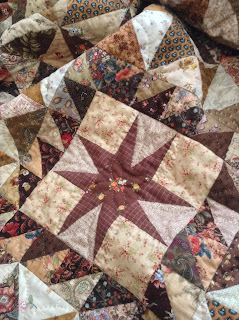
I wanted something uncomplicated, and chose to do a simple repeat of a single block, the shoo-fly which is a favorite of mine.  It has been very simple, but time consuming because of all those dang Triangle Squares.

I started by cutting 2 1/2" strips of my chosen fabrics, then using the Easy Angle to cut the HST's, then chain piecing them together. Once all the units are ready, the blocks themselves go together very quickly.

I kinda like the color combo, and there seems to be enough rusty reds in there to add a little more interest. The idea was to have it mostly low contrast, with a few lighter greens thrown in for spark. I'm not sure how successful that strategy was, but I'm liking it just the same. The blocks will be 6" finished. I've made 88 blocks so far (that's 520 Triangle Squares, folks) but I think I'll make a couple more rows before I sew it together.

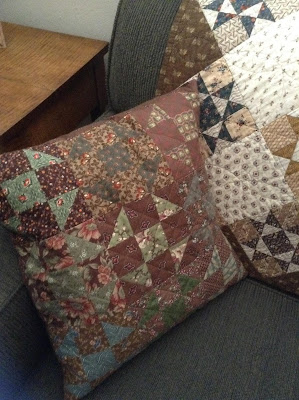
Meanwhile I made an additional nine blocks to re-cover a cushion for the couch in our den, where the completed quilt will probably end up as well.


I actually did make a dent in my stash, albeit a small one, so I guess we could consider that a success. Plus I'll have a cozy new quilt for snuggling in the den!

Now to figure out how to link up with Design Wall Monday, hopefully while its still Monday...

Happy Sewing!

love,
Sandy

Saturday, June 3, 2017

Triangle Squares


 I've been wanting to make a (mainly) blue-and-white quilt for a while, a sampler of some kind, and thought Lisa Bongean's Triangle Gatherings would be just about perfect. I'm a bit late. She's up to block 40, and I'm just getting started.  Above is my version of Block 1.

As you can imagine, 40 plus blocks made up of sixteen triangle squares each is a lot of TSq's (or HST's as most people call them).

Which leads to the topic of the many ways of constructing these little guys. I have to admit I'm still learning new and better ways after all these years, and would like to share some of what I've learned.

Sewing large and trimming to size 
This has been my preferred method for many years, as, IMO, it gives you the best results for absolute accuracy. It is a pain, though, meaning a lot of cutting, drawing lines, and trimming. However I have figured out a way to eliminate the line drawing part.


You know those plastic thingies you tape down to your sewing machine after lining them up with a "key" and all that jazz? I bought two different versions, neither of which really ever worked that well for me, plus they cover up the bobbin access on my machine. Why not just use a piece of 1/4" tape.

(btw the scotch tape you see is there to smooth out the bump that annoyingly flips seams the wrong way as they approach the needle, another problem I'm working on)

For a 2" finished Triangle Square, I cut 3" squares and laid a light over a dark, right sides together. Now to the sewing.


First you have to know exactly where to line up the corner where you start. You can see above how the guide on my presser foot bisects that corner.

Now you line up the bottom corner with the right side of the tape. This is where your drawn line would have been.Your guide will be travelling down this imaginary corner-to-corner line. All  you have to do is keep the bottom corner lined up with the right side of the tape as it moves toward the needle. Same concept as the plastic thingies.


Now you turn it around and sew on the other side of that imaginary line.


Cut and press open...


and trim.


 Perfect Triangle Squares! 

Next up, 
Thangles

Another method for dang near perfect Triangle Squares.
I like these because you can get 2" finished Triangle Squares from 2 1/2" strips. The problem is, you have to pin them on (or use a little dot of glue stick) to secure the paper, and it all has to be lined up perfect or your resulting square won't be perfect. And then you have to rip the papers off. TIP: make sure you shorten your stitch length when making these, for easier paper removal. 

Again, a lot of work. I thought their aught to be an easier way. Which leads me to my latest favorite tool:
Easy Angle

Why bother pinning and ripping papers when you can simply measure and cut? 
 
Again I'm using 2 1/2" strips (or pieces as you see here) for 2" finished Triangle Squares. Line up your first cut as seen above, 


and your vertical cut as seen above here. 
Note the 2 1/2" mark on the ruler, and the black point which extends over the edge of the fabric.
(btw the ruler doesn't come with a fancy glass knob. I attached that myself for easier handling.)

Now, sew.
I go ahead and line it up with my 1/4" tape, although that's not necessary if you have a 1/4" presser foot, with or without the guide. 


Again, if you've been careful with your ruler placement and cutting, your SQ's will come out accurate. 


The last thing I'm going to show you is something I just discovered:

SQangles
 I saw an ad for these recently in a quilting magazine and thought they might be just the thing when you need to make a whole lot of Triangle Squares at once, such as what I'll be doing for the Triangle Gatherings blocks. 

You get several sheets of iron-on transfers in your preferred size, which are re-usable. For the 1 1/2" size (which I'm using for the Triangle Gatherings) one sheet yields 240  Triangle Squares. I got four "good" and a fifth "iffy" transfer from one sheet, or 960+ TSqs. That's from one sheet! What you're looking at above is a partial sheet. Anyway, you sew on the dotted lines, and cut on the solid lines - same method as for Thangles, but no paper to rip. This is by far the fastest method I've used.


As with the previous methods, the resulting accuracy is dependent on  how accurately you do your sewing and cutting. Pretty darn easy in this case.

I hoping to have provided a decent introduction to these methods, and that some of you might find them useful. Please let me know if you have questions or if something doesn't make sense.

Happy Sewing, everyone! 

love,
Sandy