Wednesday, May 29, 2013

Ongoing state of my sewing room

 my messy sewing room aka "the guest room"


 I try to be organized. I really do. But somehow it always turns out like this. Amazingly though, I can morph this mess into a very hospitable guest room in something like twenty minutes.


Scraps from a fellow quilter. Pretty, but not sure what to do with them.


Frankenstein Medallion

Current recurring UFO. I call this my Frankenstein Medallion. I really love the Oak Leaf Reel block, but I only had it in me to make one. An applique-er I am not. Other random oddball blocks. Leftover strips from jelly roll. I'm thinking I might add some more HSTs along the top and bottom. Who knows. Maybe I'll just go ahead with the brown print border and call it a day.


My very first foray into the leader/ender-type thing:


See all the groovy things I learn from reading other people's blogs?

I have no idea where this is going.


Anyway, here's my tip for the day:

You perceive your house to be dirtier/messier than it really is.
Others perceive it to be cleaner/neater than it really is.
Now, go sew.


Wednesday, May 22, 2013

In The Hoop


Sandy's Civil War Sampler

 I was prompted to make this after attending the Point Bonita quilt retreat a couple years ago, where all six of my roomies had their CW sampler quilts on their beds, and all I had was a boring old Log Cabin. Theirs were from a block exchange (I sadly missed out on) and taken from the Civil War Love Letters/Diaries books.

 This started out as Barbara Brackman's Civil War block of the week, but shortly took a left turn as I started adding sampler blocks from other sources, and eliminating those I wasn't too crazy about. The Shoo-Fly blocks were supposed to be their own quilt, but ended up as setting blocks in this one.

  Barbara's instructions are for an 8" block. I drafted mine out to nine inches as that seemed to work better for me. The Shoo-Fly blocks are 6".


The reason you don't see any basting stitches or pins is because I already machine quilted it in the ditch, between the blocks.


My goal is to have this finished in time for our guild's 2014 Quilt Show in February. So far I've quilted 22 out of 59 blocks, and eight out of 24 border triangles. My hand quilting goes very slow these days, as I'm fighting tendon issues ~

Monday, May 20, 2013

strips and squares

How timely - yet again! I'm now linked up to Kim's Scrap Basket Sunday.

In an attempt to clear out some of the mess and organize my sewing room recently, I cut a whole bin worth of scraps into strips and squares - mostly 2 1/2" and 1 1/2". And because I also just recently acquired some new fabric, after washing but before folding and putting it away, I went ahead and cut some strips out of it as well. There went that empty bin, now full of 2 1/2" strips. Plus now I have to purchase some smaller boxes for the smaller strips and squares. So much for freeing up space. 

So what does one do with all those strips and squares? I've looked at lots of jelly roll books, and frankly, I'm underwhelmed by the patterns they offer. I even googled jelly roll quilts, and still didn't see anything that particularly piqued my interest. I finally sat down with some graph paper, drew up a few blocks, and attempted to design - if you can call it that - my own "jelly roll" quilt.


I chose to work with four blocks: a simple nine-patch - two versions; a shoo-fly, and an Ohio star. All of which can be made from 2 1/2" squares. Most of mine are from Judie's 25th anniversary, and Moda's Collection for a Cause - Friendship. The rest are previously mentioned scraps.

I made a bunch of blocks - they go pretty fast - then auditioned a couple ideas:

off-set with blue sashing
on point
 As much as I like them on the denim, I'm thinking I want 
something more scrappy and random looking. 
I want it to look "old" and like it was made from leftovers.


This actually has a subtle pattern to it, with similar blocks running on the diagonal. I have to admit, I'm sorta liking it.


This is what I got done over the weekend. Maybe you can sort of see the pattern better with more blocks? Am I on the right track here, or should I go back to the blue? Or.... ?? Maybe incorporate a center medallion of some sort? I welcome any and all thoughts.


Now, for a tip:


Although I certainly didn't come up with this idea. In fact, after over twenty years of quilting - and probably a hundred or more quilts - I only recently learned to clip the intersections and fan them out. This greatly reduces bulk, and also allows you to switch the seam when connecting it to another block. Invaluable!


Now I've carried it a step further and am starting to actually split some of the seams themselves. Am I crazy?? I would only do this on small and/or more intricate blocks. Matching seams hasn't been a problem, but a smaller stitch length is probably a good idea. Quilting in the ditch might be problematic in a split seam, so take that under consideration as well.

I would love to hear others opinions on this. Has this worked for you? or is splitting seams "committing a sin" as I've thought for the past twenty + years?

love,
Sandy

Friday, May 17, 2013

thread and other cool things

I've been super busy at work this week, and too brain dead at the end of the day to do anything other than scrolling through all the quilting tips on Geta's site.  Lots of cool tips, so check it out if you haven't already.

The big standout is, everyone seems to be raving about Aurifil thread, and I'm determined to find out what all the fuss is about. Personally, I use Connecting Threads 50-wt thread, and have been happy with it for years. (could I be hearing a curious "oh?" in the background, or a collective "groan.." ?) Connecting Threads is literally one fourth the price of Aurifil, so I think it rates consideration. Anyway, I mean to do a comparison so went ahead and bought a big spool of Aurifil at my local quilt shop yesterday. Today I will fill a couple bobbins and do some sewing. I will report back my findings.

 Meanwhile, I welcome any comments/opinions/suggestions about this topic, what is your experience with various threads? Have you tried Connecting Threads? Mainly - what makes Aurifil worth the price?

Another thing I'd love to hear your opinion about is Superior Threads pre-wound bobbins. These are very convenient to use, and last seemingly twice as long as a "normal" bobbin.  Unfortunately I had already used several spools by the time I examined it close enough to discover the reason - its noticeably thinner than my normal sewing thread. Although I haven't experienced any breakage while sewing with these bobbins, I did "test" its strength by pulling on it, and it breaks disturbingly easily. I am now keeping my fingers crossed this will hold up over time and not lead to early degradation of my quilts! Has anyone else used these? What is your experience?

OK, so much for thread.

On to other groovy things:  I know for sure I'm gonna have to get one of those Angler2 thingies, now that I've cut all those 2 1/2" strips and squares (to be covered in an upcoming post on "organizing"). Please don't ask me who's tip this was, but THANK YOU! This should make it a breeze to make HSTs.
Connecting Threads has a good price on these.
Click here for a tutorial on how to use it. (not mine obviously - I grabbed off youtube)

Thanks again to whoever posted this tip!

PS:  to continue my plug for Connecting Threads - they have great prices on lots of things, from fabric to notions, to thread, books and more. While I am not crazy about most of their fabric patterns, it does seem to be good quality. You can get sampler packets of nearly everything they have.

love,
Sandy


Saturday, May 11, 2013

Quilters Favorite Tips

How timely is this! I just posted this tip yesterday (in a much more lengthy post) then today I happened upon Geta's Quilting Studio, and her request for quilting tips! I'm all for sharing tips, so I jumped on this right away.  This post is now linked up to her blog. You, too, can join the party, if you haven't already. Just click on the link above, and follow her easy instructions.

Geta, I couldn't get your "button" to show up, but at least I got the above link to work. I'll have to give that button thing another try later ~

OK, so here's my tip:
If you're going to a quilt retreat, and you don't want to pack your entire stash,  try cutting your blocks at home first, then press them down to freezer paper. Your blocks are now "machine ready" taking up minimum space, and everything is nice and tidy. When I get to my retreat and am ready to sew, I will transfer the pieces - one or two blocks at a time - to a flannel covered board next to my machine. Now I'm ready to sew away! This strategy also makes much better use of your retreat time.


Geta has also posted a list of questions for those of us participating. Here are my answers to a few of them:

List a few of your favorite notions
At the moment its a self threading needle. It has a little "V" on the eye end, that you "click" the thread into. This has become indispensable for burying short thread ends! I thank my friend Joanne for turning me on to these needles.

Another favorite is my Clover seam ripper. I use this not only to guide the fabric under my sewing machine needle, but to cut the thread when the piece has passed through. No reaching for snips, as the ripper is already in my hand. Oh yeah.. it also comes in handy for un-sewing - ha ha! 

Hand quilting tips:
I like to start by pin basting, then I machine quilt in the ditch between the blocks. Then I remove the pins. My quilt layers are now locked down, and half my quilting is done.  Now I can proceed to hand quilt in the open areas, 1/4" from the seams, or whatever else I feel like doing. My quilt is finished in half the time, but still retains that hand-quilted look and feel.

Other quilting tips:
Make what you love. Buy the fabric that you love. If you hate a project, feel free to pass it along to someone else.

That's about it from me, but be sure to check out  "Quilters Favorites" for more tips from quilters.

Have fun!

love,
Sandy

Friday, May 10, 2013

The Farmers Wife


After all these years, I've discovered that I love sampler quilts! I think because each block is its own little project, which I find very exciting. And.. challenging.  And, the end result is so interesting and... engaging.  I recently (finally) got started on my Farmers Wife quilt, above, and I'm really excited about it.

So here's the deal.  I have this quilt retreat coming up, and I thought it might be a good idea to have most of my projects "machine ready" so to speak, to avoid having to pack my entire stash, and to make better use of my time. I find a retreat setting is not always conducive to making the best creative decisions, if you know what I mean. Sometimes it can take me an entire day to pick the fabrics for a single block!  Add to that, limited if any design wall space.

Anyway, I got the bright idea to get a head start by picking fabrics for a bunch of blocks, cut the pieces, then iron them down onto freezer paper. This way I end up with a nice tidy stack, ready to go - and sew - at the retreat. I've done this in the past, but not with the freezer paper - so I hope it all works out!

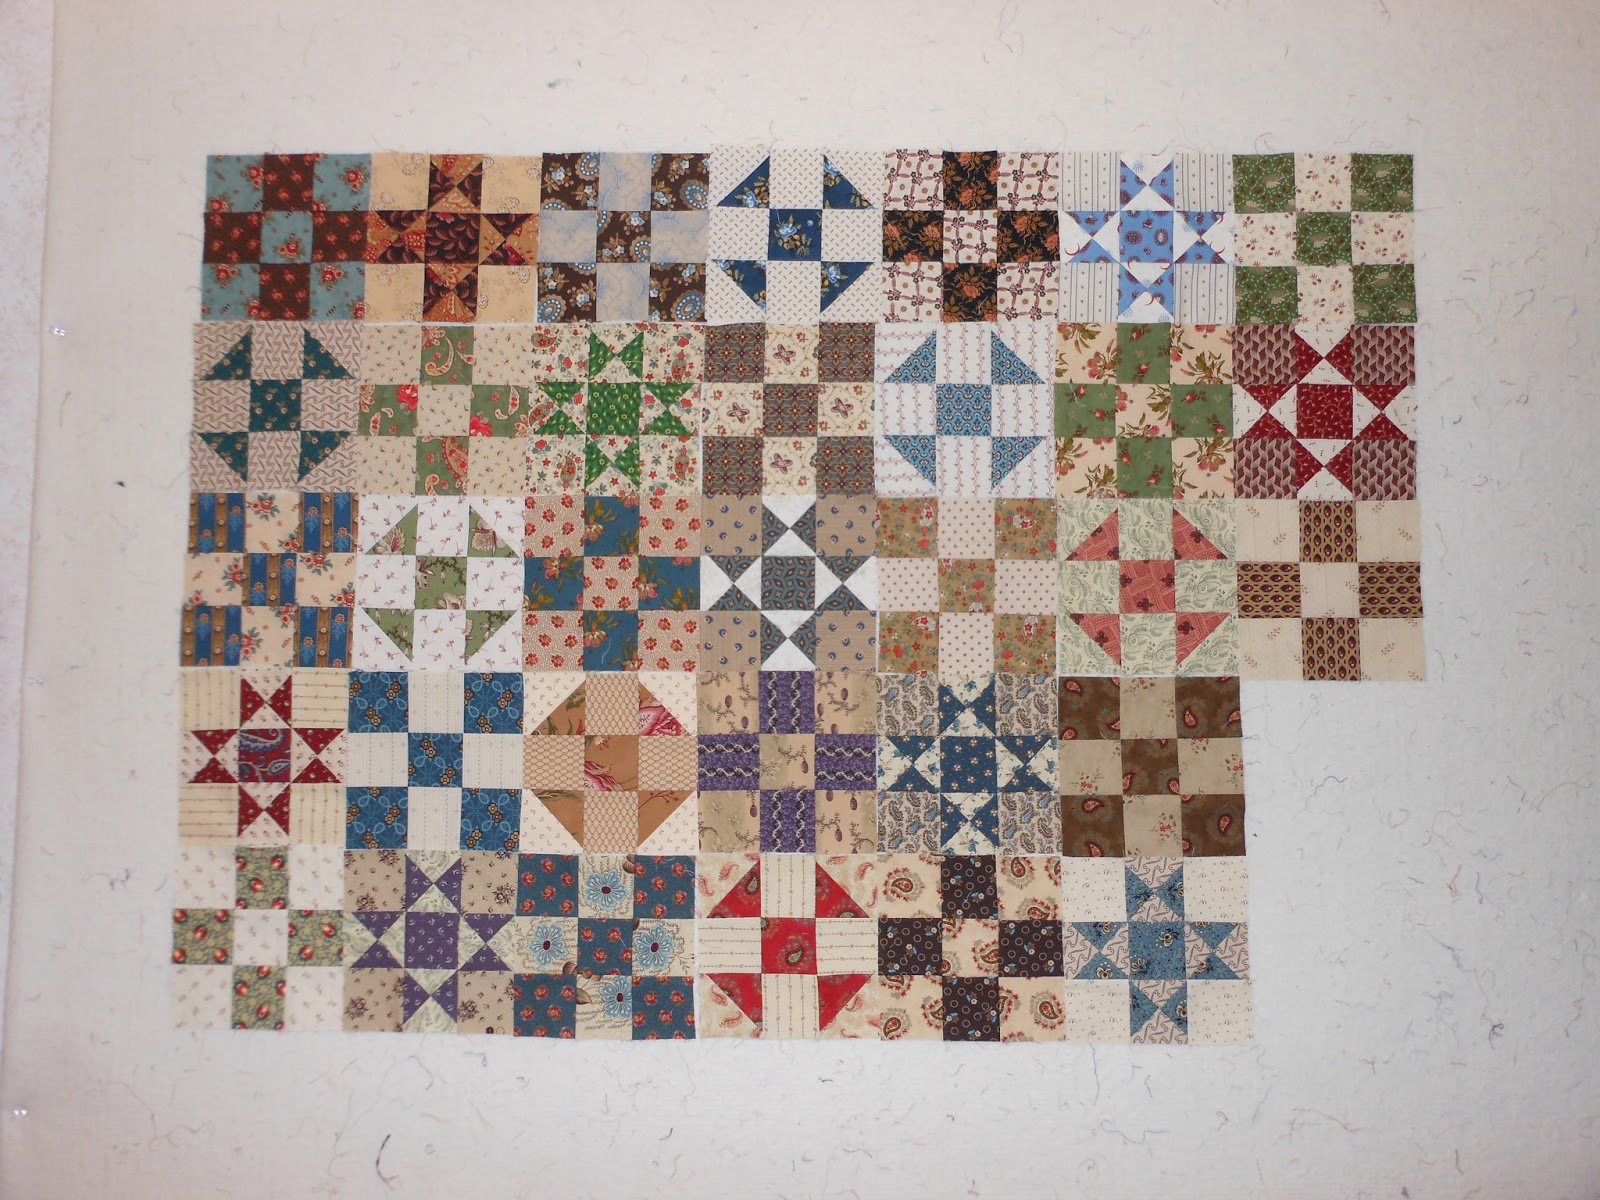
You can see what I've cut so far. I admit it looks pretty funky. I can't wait to sew them and then see how they look. No doubt I'll end up rejecting a few. I don't know how many more I will make, but I think with these I'll have enough to start auditioning setting ideas/fabric.


I had to use the templates for #18 above, a process I'm not very experienced with. But I thought I'd challenge myself, as I really really love this block! Wish me luck...

Do you recognize the Cocheco Mills blue? I lucked out and found a little bundle of eighths - twelve fabrics, browns and blues - at one of our vendor booths at our Feb quilt show. I adore these fabrics!

 Anyway, if this succeeds, I'll try more of them as there are several "templates required" blocks in that book that I really want to make. Most blocks I can manage to draft out, but the odd angles on some of these totally throw me.


Here they are, stacked up (sort of) and ready to pack.


I don't intend to make every block in the book, but rather cherry pick the ones I like the most. I'll post more as this progresses. 


Meanwhile, I've also gotten myself involved in a Farmers Wife block exchange, using blue as the main color. Here are the blocks I've made:

April's block - Star Gardener

June's block - Evening Star


 Here are the blocks I received for April, plus the ones I made.  Doesn't look like much at the moment, but I bet it will shape up into something lovely.
 

Well that's it for today!

I want you all to know how much I really enjoy reading your blogs, and I hope you enjoy my posts. I'm pretty new at this, and don't have a lot of time to devote, but I love tagging along with all the fun! 

love,
Sandy