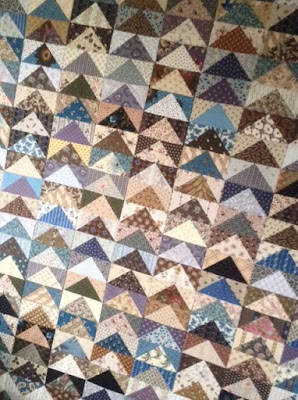
I started out using some pre-cuts I had on hand, which had started out 6" wide, but shrunk of course, when I washed them. So I made my geese to finish at 4 1/2" rather than the 5" as I desired. No big deal. I also dug into my scrap bin and got quite a few geese out of there. However I wasn't entirely thrilled with the resulting flock, which looked kind of a mess. (to be fair, the above photo was taken at night, under the ceiling light, which makes it look really warm and rather ghastly, imo)
I decided to take a little more control over the colors, and limit my choices to a palette that was more pleasing to my eye. Blues and browns, tans, grays and creams (but no "white"whites) purples, and blacks. Much better, methinks. (And what a difference natural daylight makes in the photo.) Some of the pre-cuts and scraps still worked, but now the geese were mostly coming out of my main stash. Which isn't a bad thing..
This is the method of construction I decided on, which yielded two geese for each pair of 5 1/2" squares.
I used my "Angler 2" which eliminated the need to draw lines through the squares, and sped things up considerably.
If you look closely, you can see how you position the needle at the top corner. The bottom corner follows the middle line on the Angler (previous photo), as you stitch.
Trim, press out, and repeat on the other side. And don't throw those waste triangles away. I call them bonus triangles, and have already sewn a bunch of them into hourglass blocks and triangle squares (for another yet-undetermined project ~ ).
After auditioning a few layout ideas, I ended up using a random placement, with all the geese flying in the same direction.
I didn't want this to be a copy of my friend's quilt though, so I had to do something to make it "mine" if you know what I mean, so I arranged some of the geese to make top and bottom borders.


I happen to have been
Meantime, I washed (or more accurately, soaked and rinsed) some of the smallest scraps of the indigo (previous post) with no bleed issues. After they dried, I pressed them, then went ahead and made three tiny little 9-patches.
Yes I'll definitely be making more of these, enough for a cute little mini!
love,
Sandy


That is a great looking flying geese quilt. I like the color palette you have chosen--controlled scrappy always works for me. :)
ReplyDeleteNice border treatment, too.
Oh, those little indigo 9-patch blocks are adorable!
Love the geese I think the medium print is maybe to close to the geese? Perhaps a narrow strip in between to divide the two?! Or use the light er fab?
ReplyDeleteWow! That is a lot of geese! Those little 9-patches are absolutely adorable!!
ReplyDeleteLove the way you are using your fabrics!
ReplyDeleteWhat a nice blog - also our recent posts are twins! flying geese and nine patches. I've added you to my bloglovin list
ReplyDelete